
GateRook adds one server to Cursor's config, ~/.cursor/mcp.json. Choose how Cursor signs in: with a token only for Cursor written to that file, or through your browser, with no token in the file.
Before you start, install GateRook and Cursor. The screenshots come from a local test setup with one MySQL connection, mysql-demo, on the default endpoint. Your connections and endpoint address can differ. Select a screenshot to open it at full size.
1. Choose Cursor and select Connect
Open GateRook and go to AI apps. GateRook lists the AI apps it finds on this computer. Next to Cursor, select Connect.
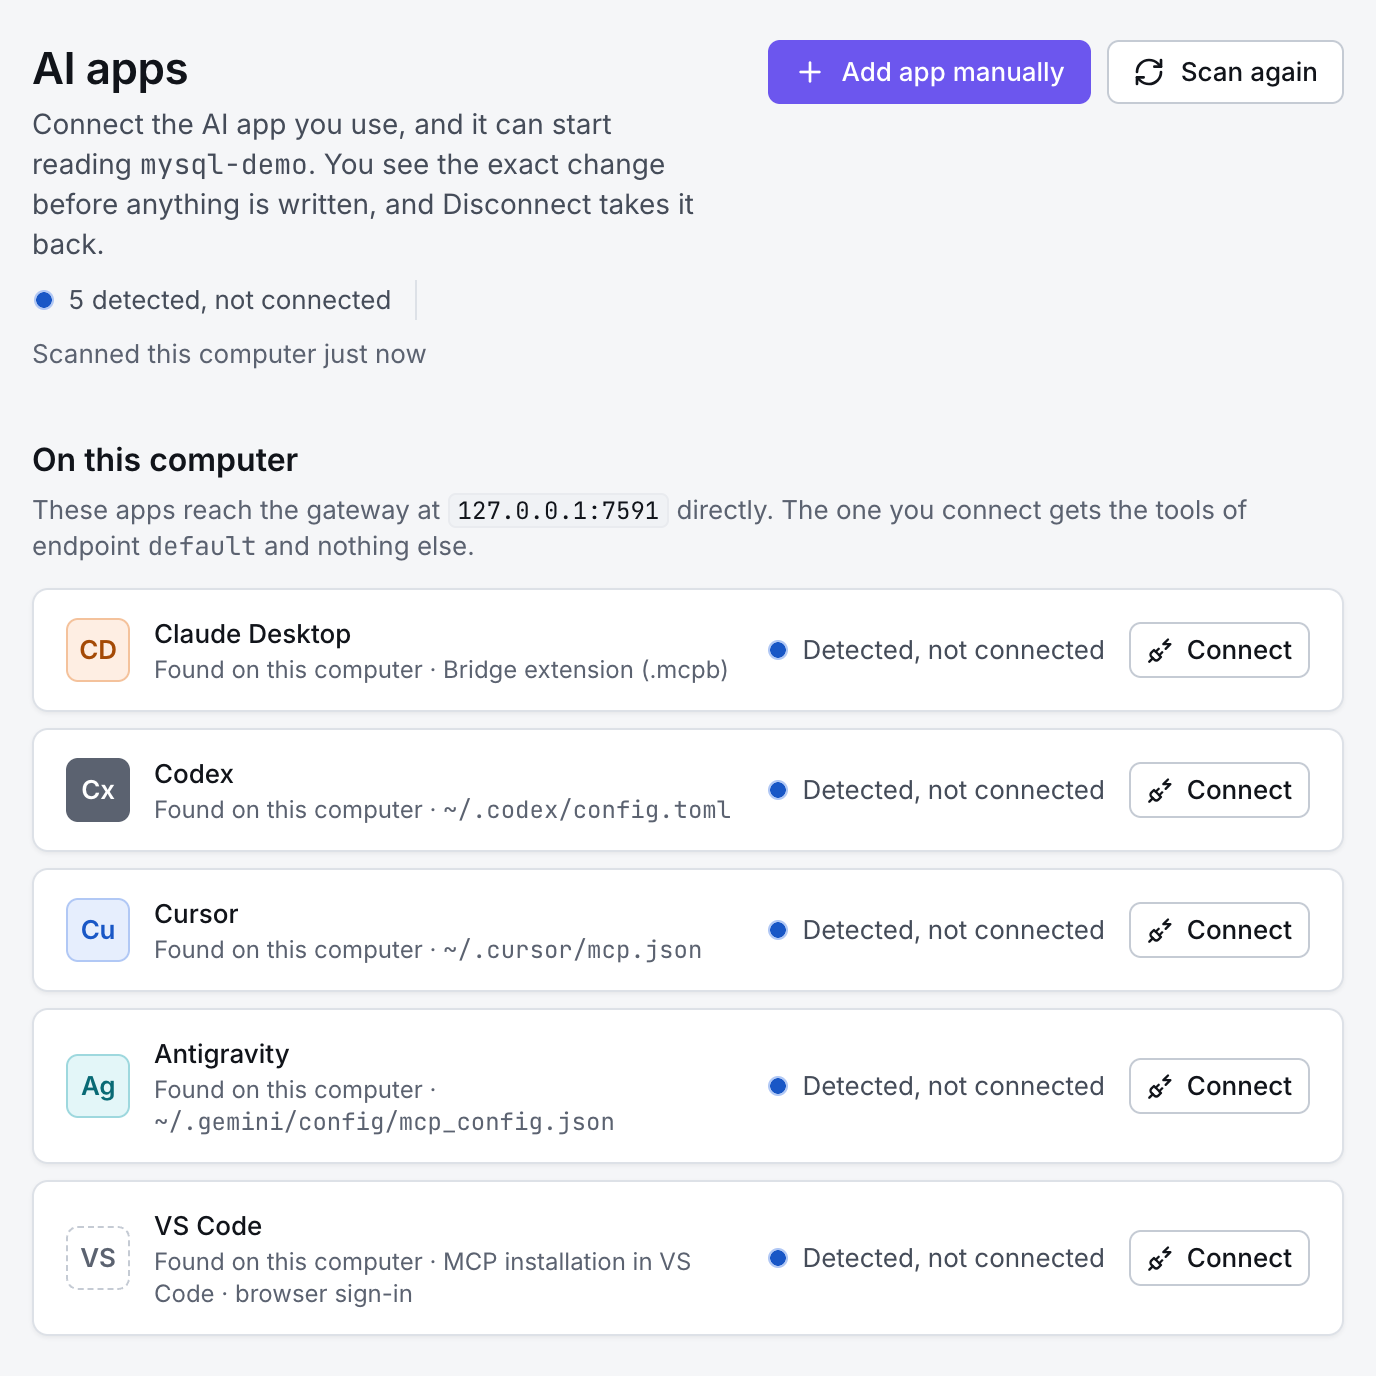
2. Choose how Cursor signs in and confirm
Under Sign-in, keep Token in the file to write a token only for Cursor into ~/.cursor/mcp.json. Name it and choose when it expires. To keep the token out of the file, choose Sign in through the browser. Then select Connect Cursor.
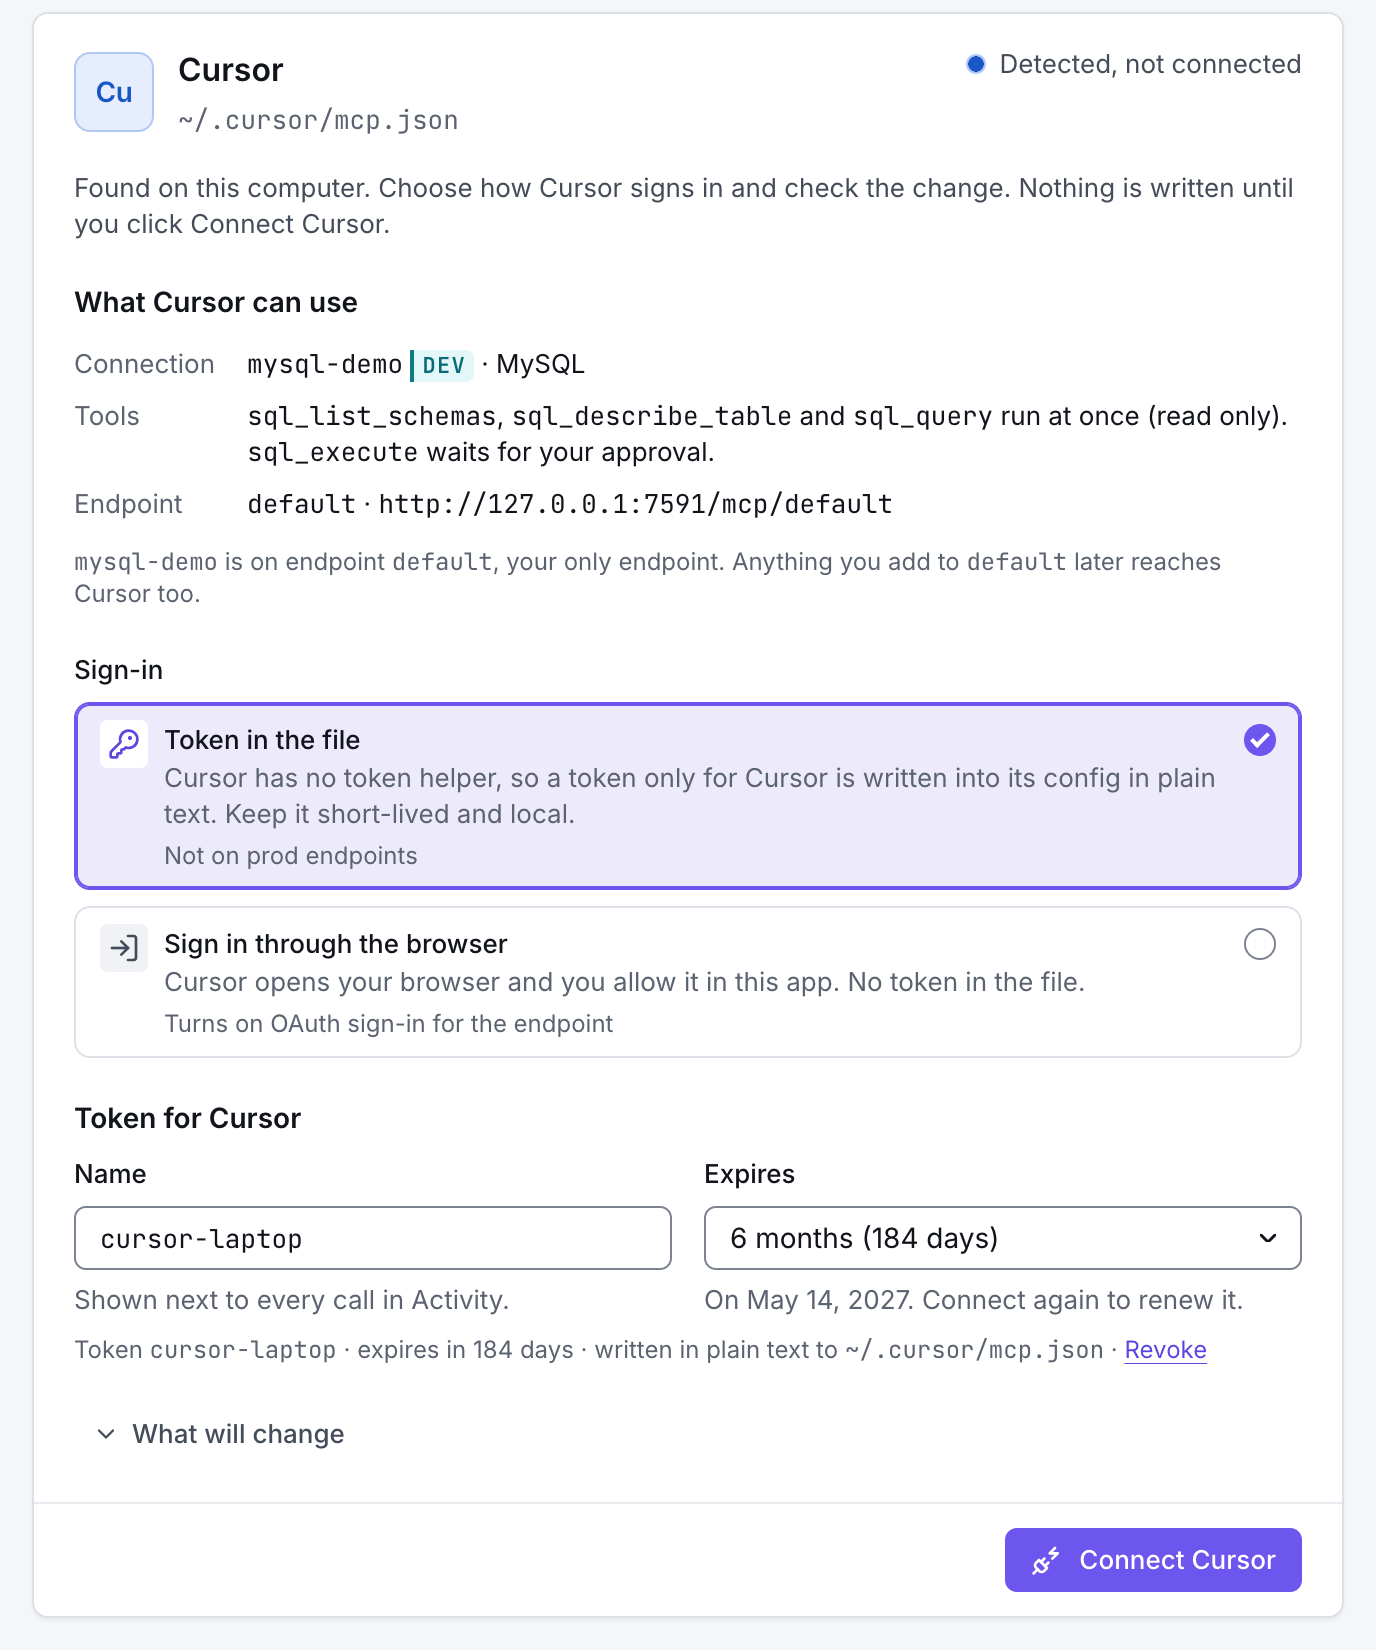
In Cursor, open Settings › MCP and turn on gaterook-default. With browser sign-in, Cursor opens its own install dialog instead: install the server, then allow the sign-in in GateRook.
3. Check the connection with a prompt
Under Check that it works, GateRook suggests a prompt for your first connection, here Show me the tables in mysql-demo. Open a new chat in Cursor and ask it.
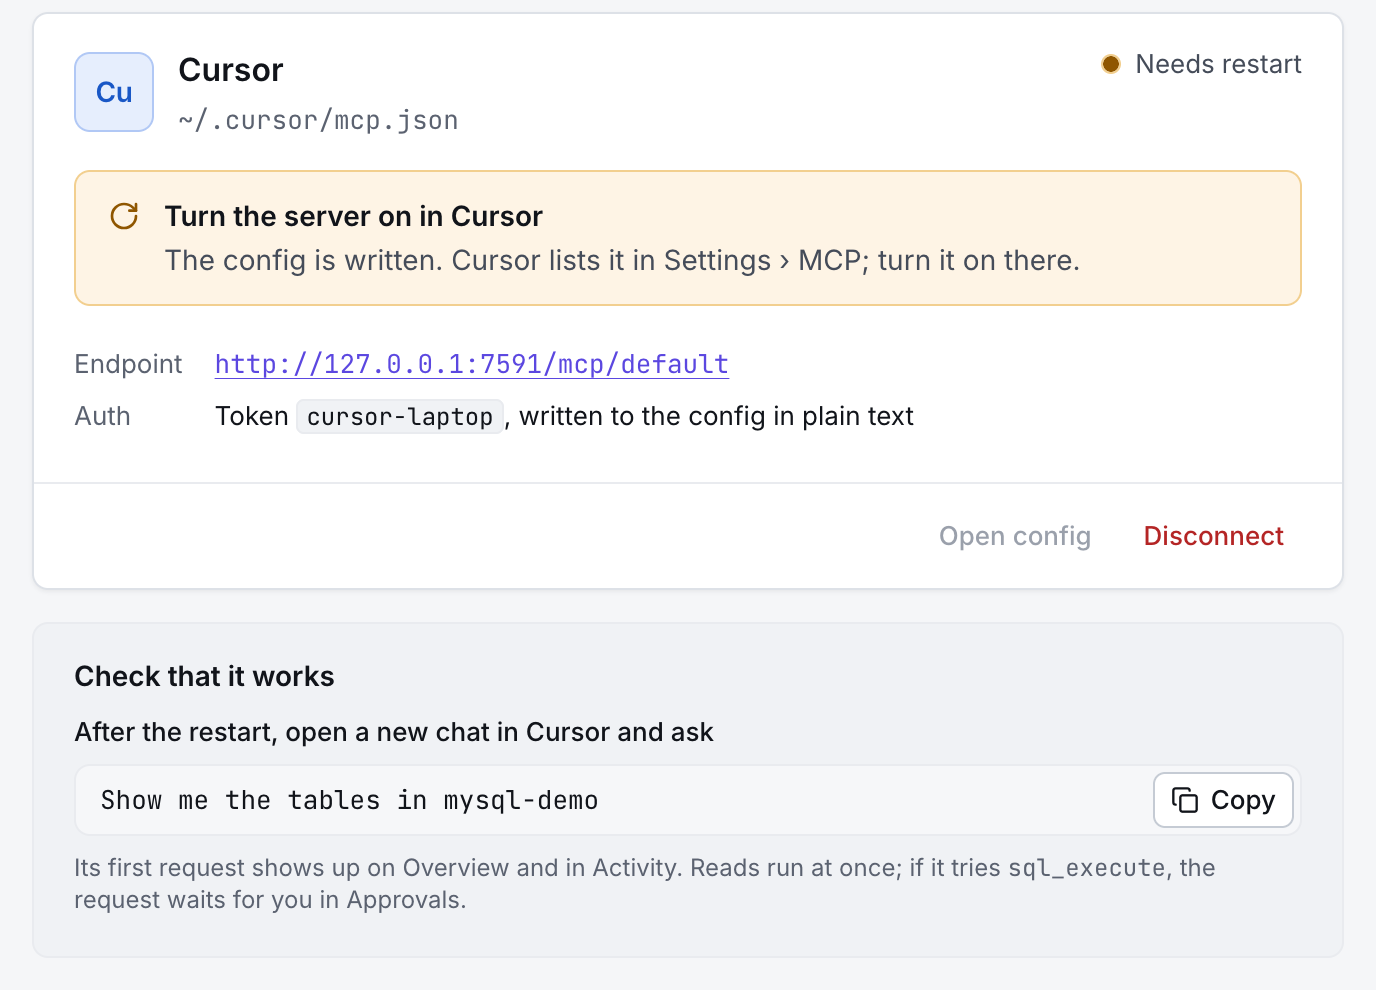
Cursor answers through GateRook's tools. Reads run at once, changes wait for you in Approvals, and every request appears in Activity with the token name.
Next, give Cursor more to work with: add a database, logs, a cloud account or an MCP server.