
AlloyDB for PostgreSQL uses GateRook’s PostgreSQL connector. With a database user and password, through the instance's IP and the cluster's CA certificate, or the AlloyDB Auth Proxy on this computer.
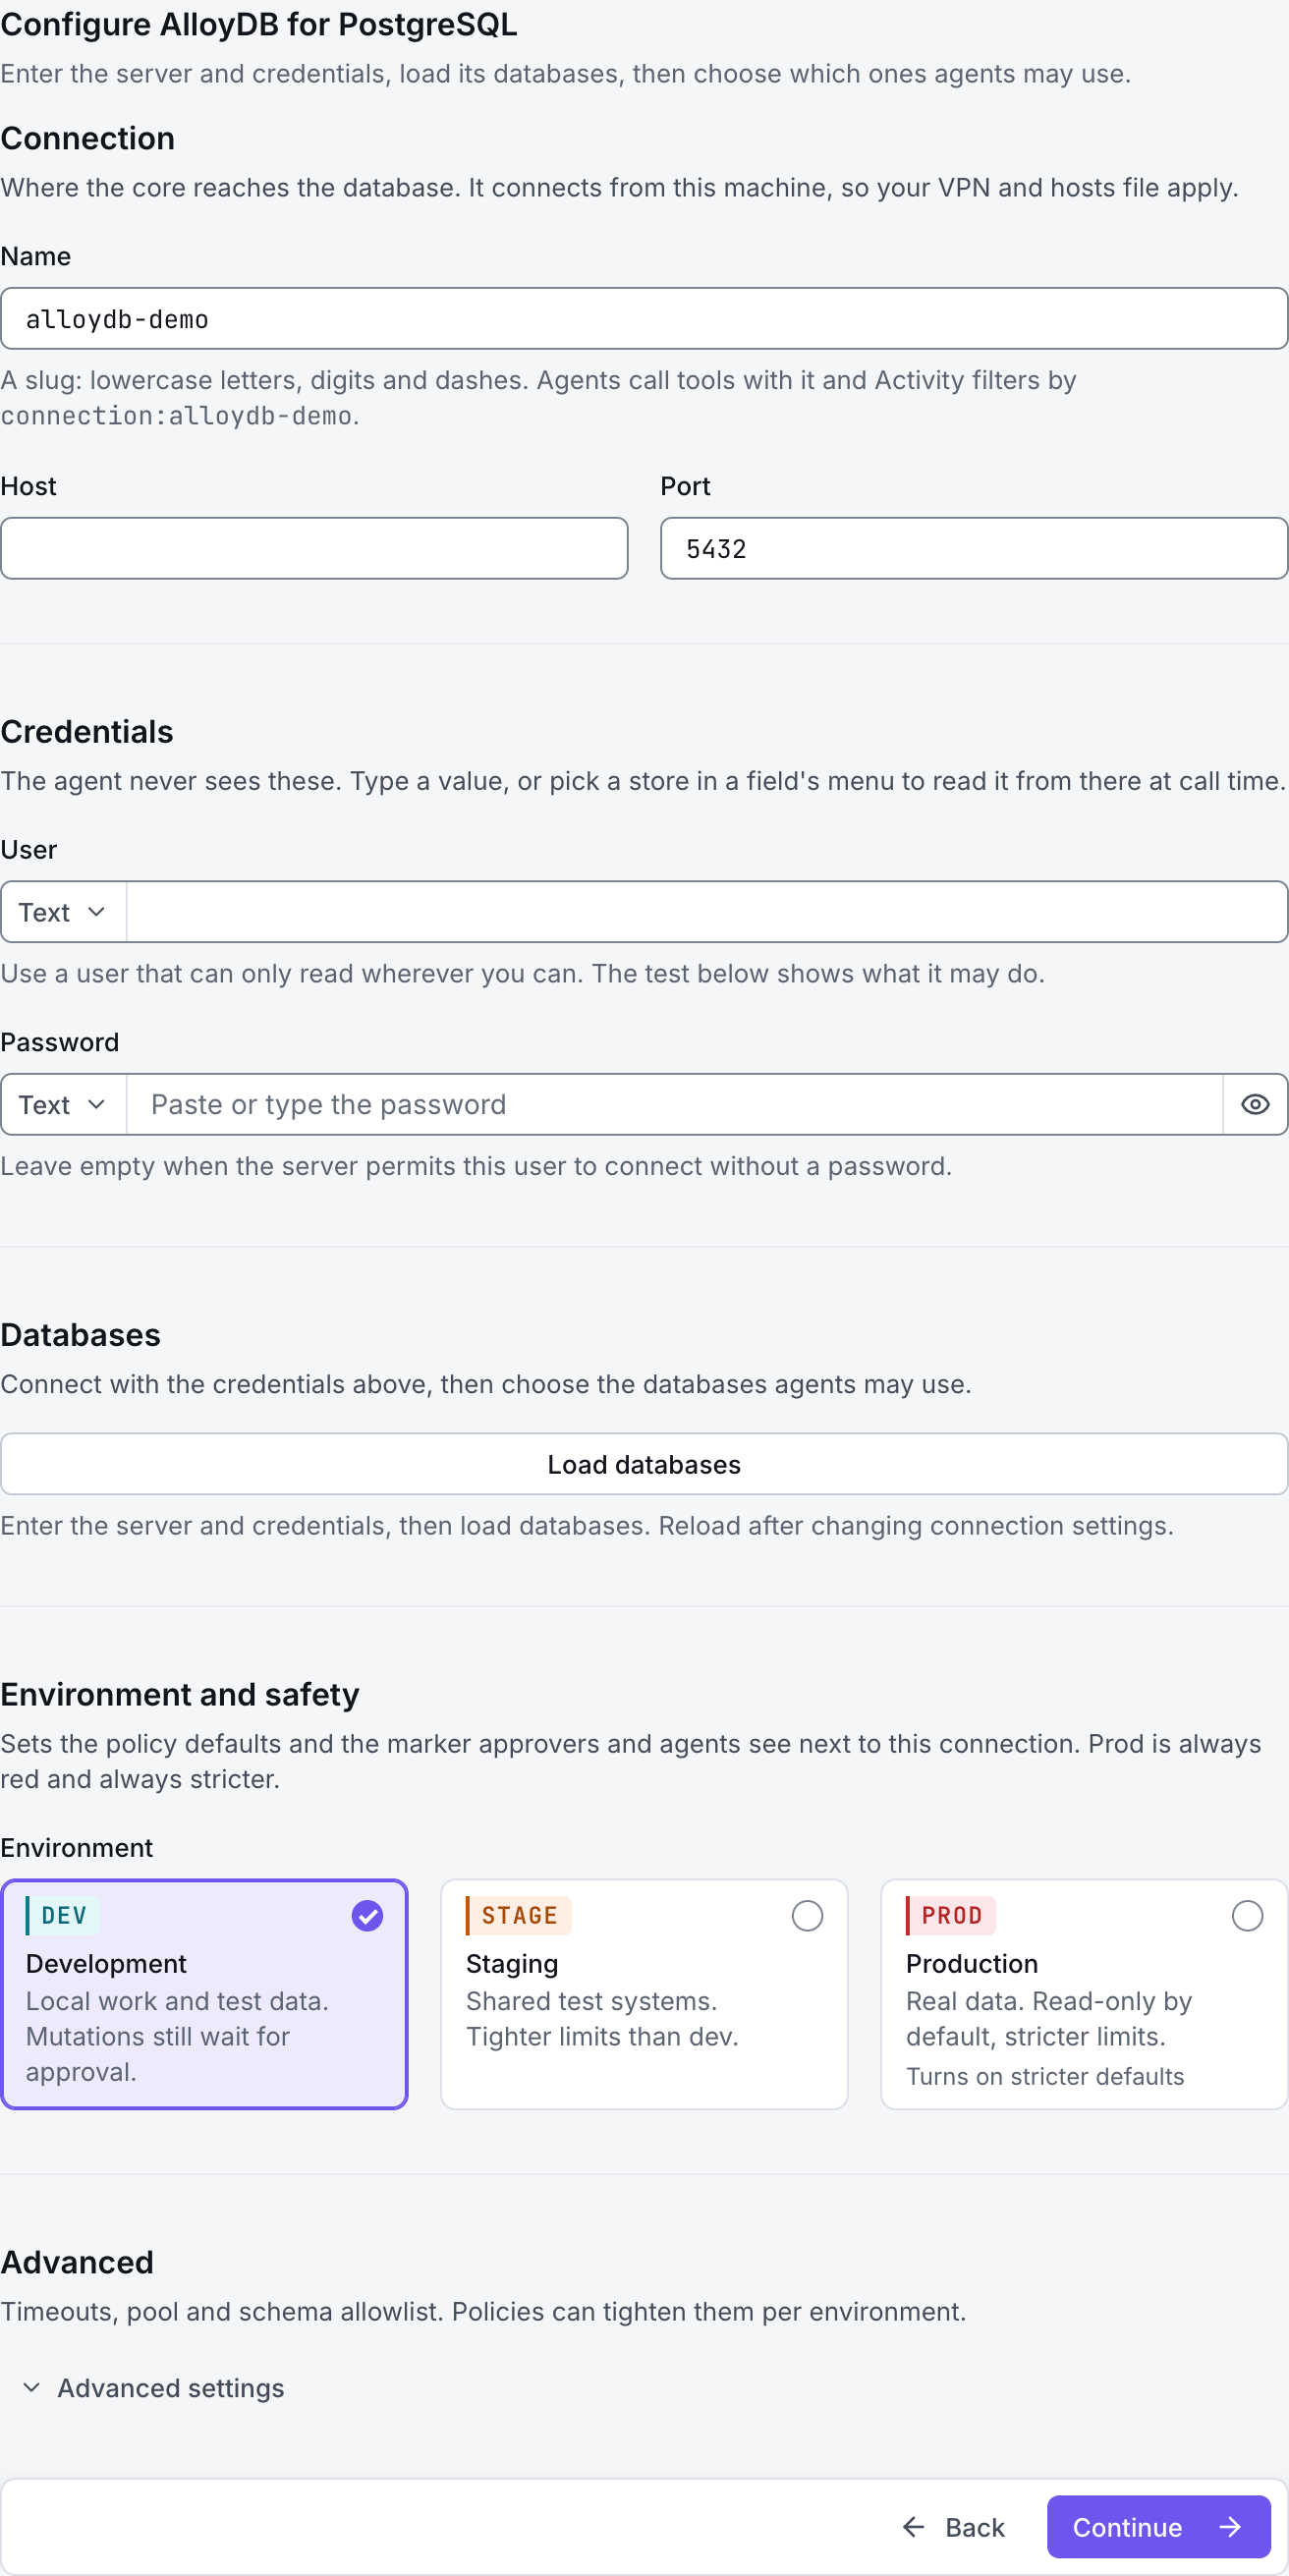
The screenshots show GateRook 2.0.0: the AlloyDB for PostgreSQL form, the endpoint selector, and this connector’s actual tool preview. The form and preview have not been saved. Select a screenshot to open it at full size.
1. Create a connection and enter the settings
In GateRook, open Connections, select Add connection, search for AlloyDB for PostgreSQL, choose its card and select Continue to configure.
Prepare an AlloyDB database user and password. Use an instance address reachable from your computer or start the AlloyDB Auth Proxy locally.
The Auth Proxy needs its own Google Cloud authorization. Its instance URI identifies the Google Cloud project, region, cluster and instance; it is not the value for GateRook’s Host.
Enter a Name, for example alloydb-demo. Your AI app uses this name to choose the connection.
Choose AlloyDB for PostgreSQL. Enter a Name, database User and Password, and the selected instance’s Host and Port. For the local proxy, use 127.0.0.1 and its listening port.
For a direct connection, configure SSL mode and the cluster’s CA certificate (PEM). A proxy connection can use Auto on the loopback hop while the proxy secures its connection to AlloyDB.
Select Load databases, then choose only the databases this connection should expose. If loading fails because the account cannot connect to postgres, set Discovery database to a database it can access and try again.
Choose Development, Staging or Production to match the service. Review the connector’s limit and access settings before continuing.
2. Test the connection and add it to an endpoint
Select Continue to test. GateRook checks the settings from your computer. Review the result and resolve any connection, certificate or permission error before continuing.
If the proxy cannot connect, check its instance URI, Google Cloud authorization and network path. A successful cloud sign-in does not replace the database user’s password or table grants.
After the test passes, select Continue to add to an endpoint. Choose the endpoint your AI app uses, review its tool modes, then select Save connection. GateRook offers default as the starter endpoint.

3. Use the connection from your AI IDE
After saving AlloyDB for PostgreSQL on the endpoint and passing its connection test, ask your AI app to use alloydb-demo, or the name you chose. If its tools are missing, confirm the endpoint assignment and refresh the MCP connection or start a new chat.
The preview below shows this connector’s default tools before saving. The table explains what each tool can do; connection settings, credentials and endpoint policies can restrict access further.
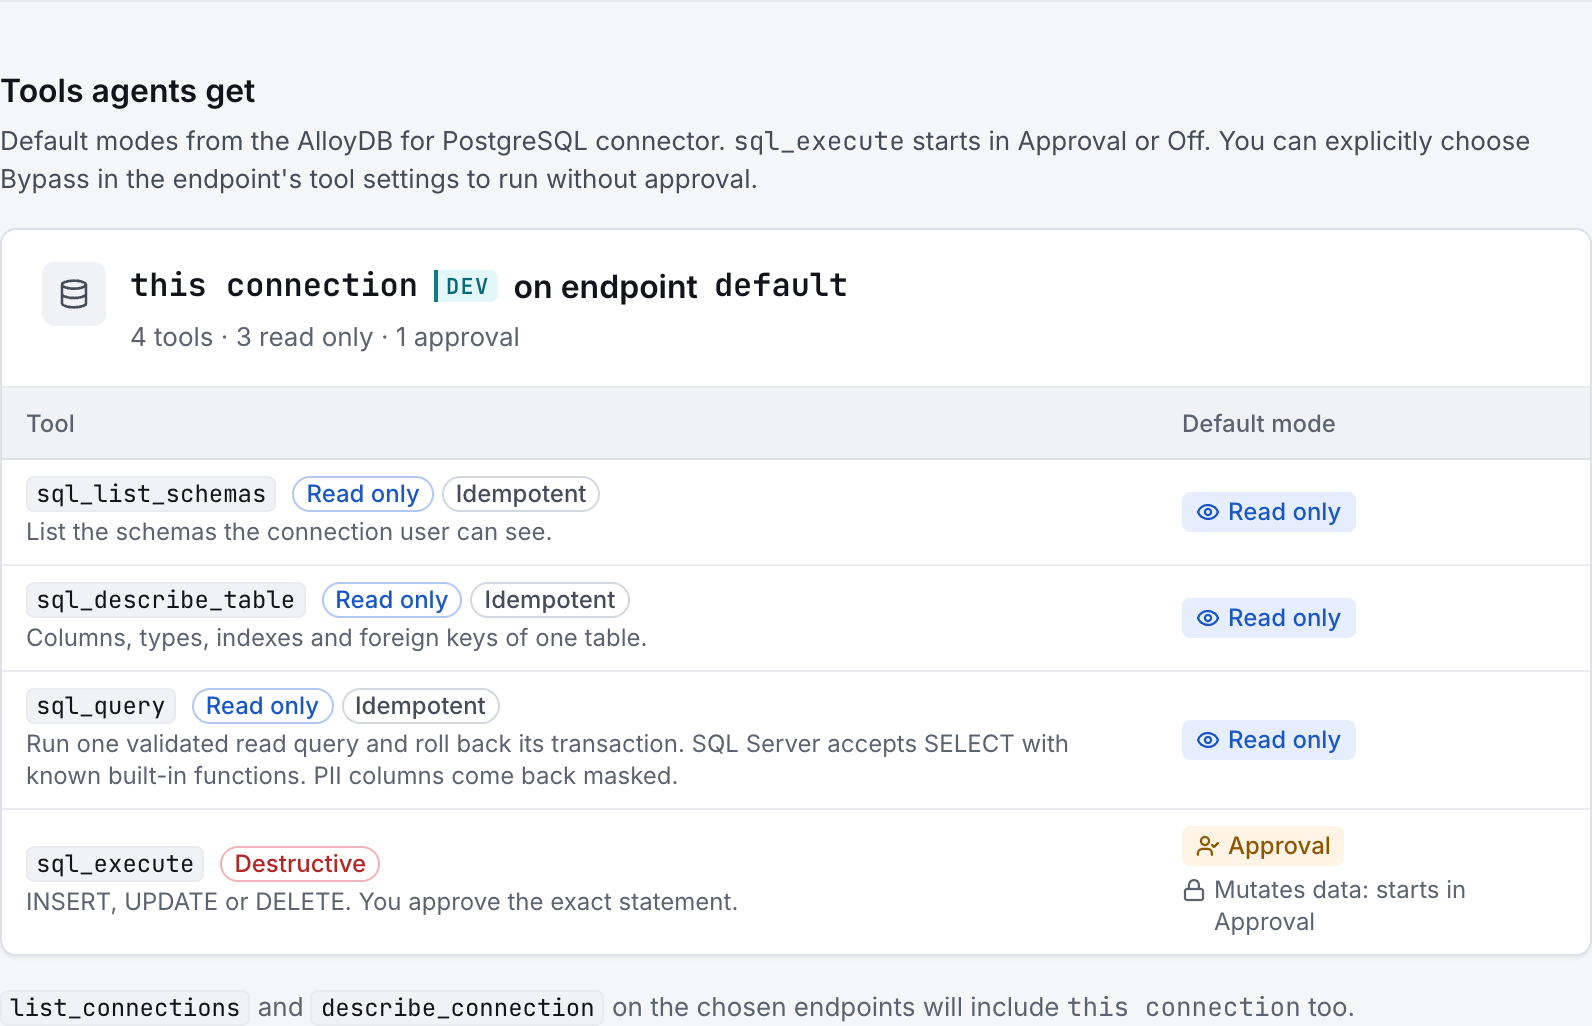
Start with a small read request. Replace example resource names with existing resources your connection may access. Open Activity after the call to inspect its connection, tool, arguments, policy decision and result metadata.
Ask your AI, for example
- “List schemas and tables on my AlloyDB connection.”
- “Describe the columns and indexes of the AlloyDB table I select.”
- “Summarize the last day of events in my selected AlloyDB table.”
| Tool | What it does | Starts as |
|---|---|---|
sql_list_schemas | List schemas, tables and views in the selected PostgreSQL database, within the connection and policy restrictions. | Read only |
sql_describe_table | Describe a table’s columns, types, keys and indexes where available. | Read only |
sql_query | Run one validated PostgreSQL read statement in a read-only transaction, then roll it back. Function allowlists, database permissions and output limits apply. | Read only |
sql_execute | Run supported data or schema changes with Approval by default. Database permissions and the environment policy determine which changes are allowed. | Approval |
You can change each tool’s mode on the endpoint. Every call your AI makes appears in Activity.