
MongoDB Atlas uses GateRook’s MongoDB connector. With the cluster's mongodb+srv:// connection string and a database user.
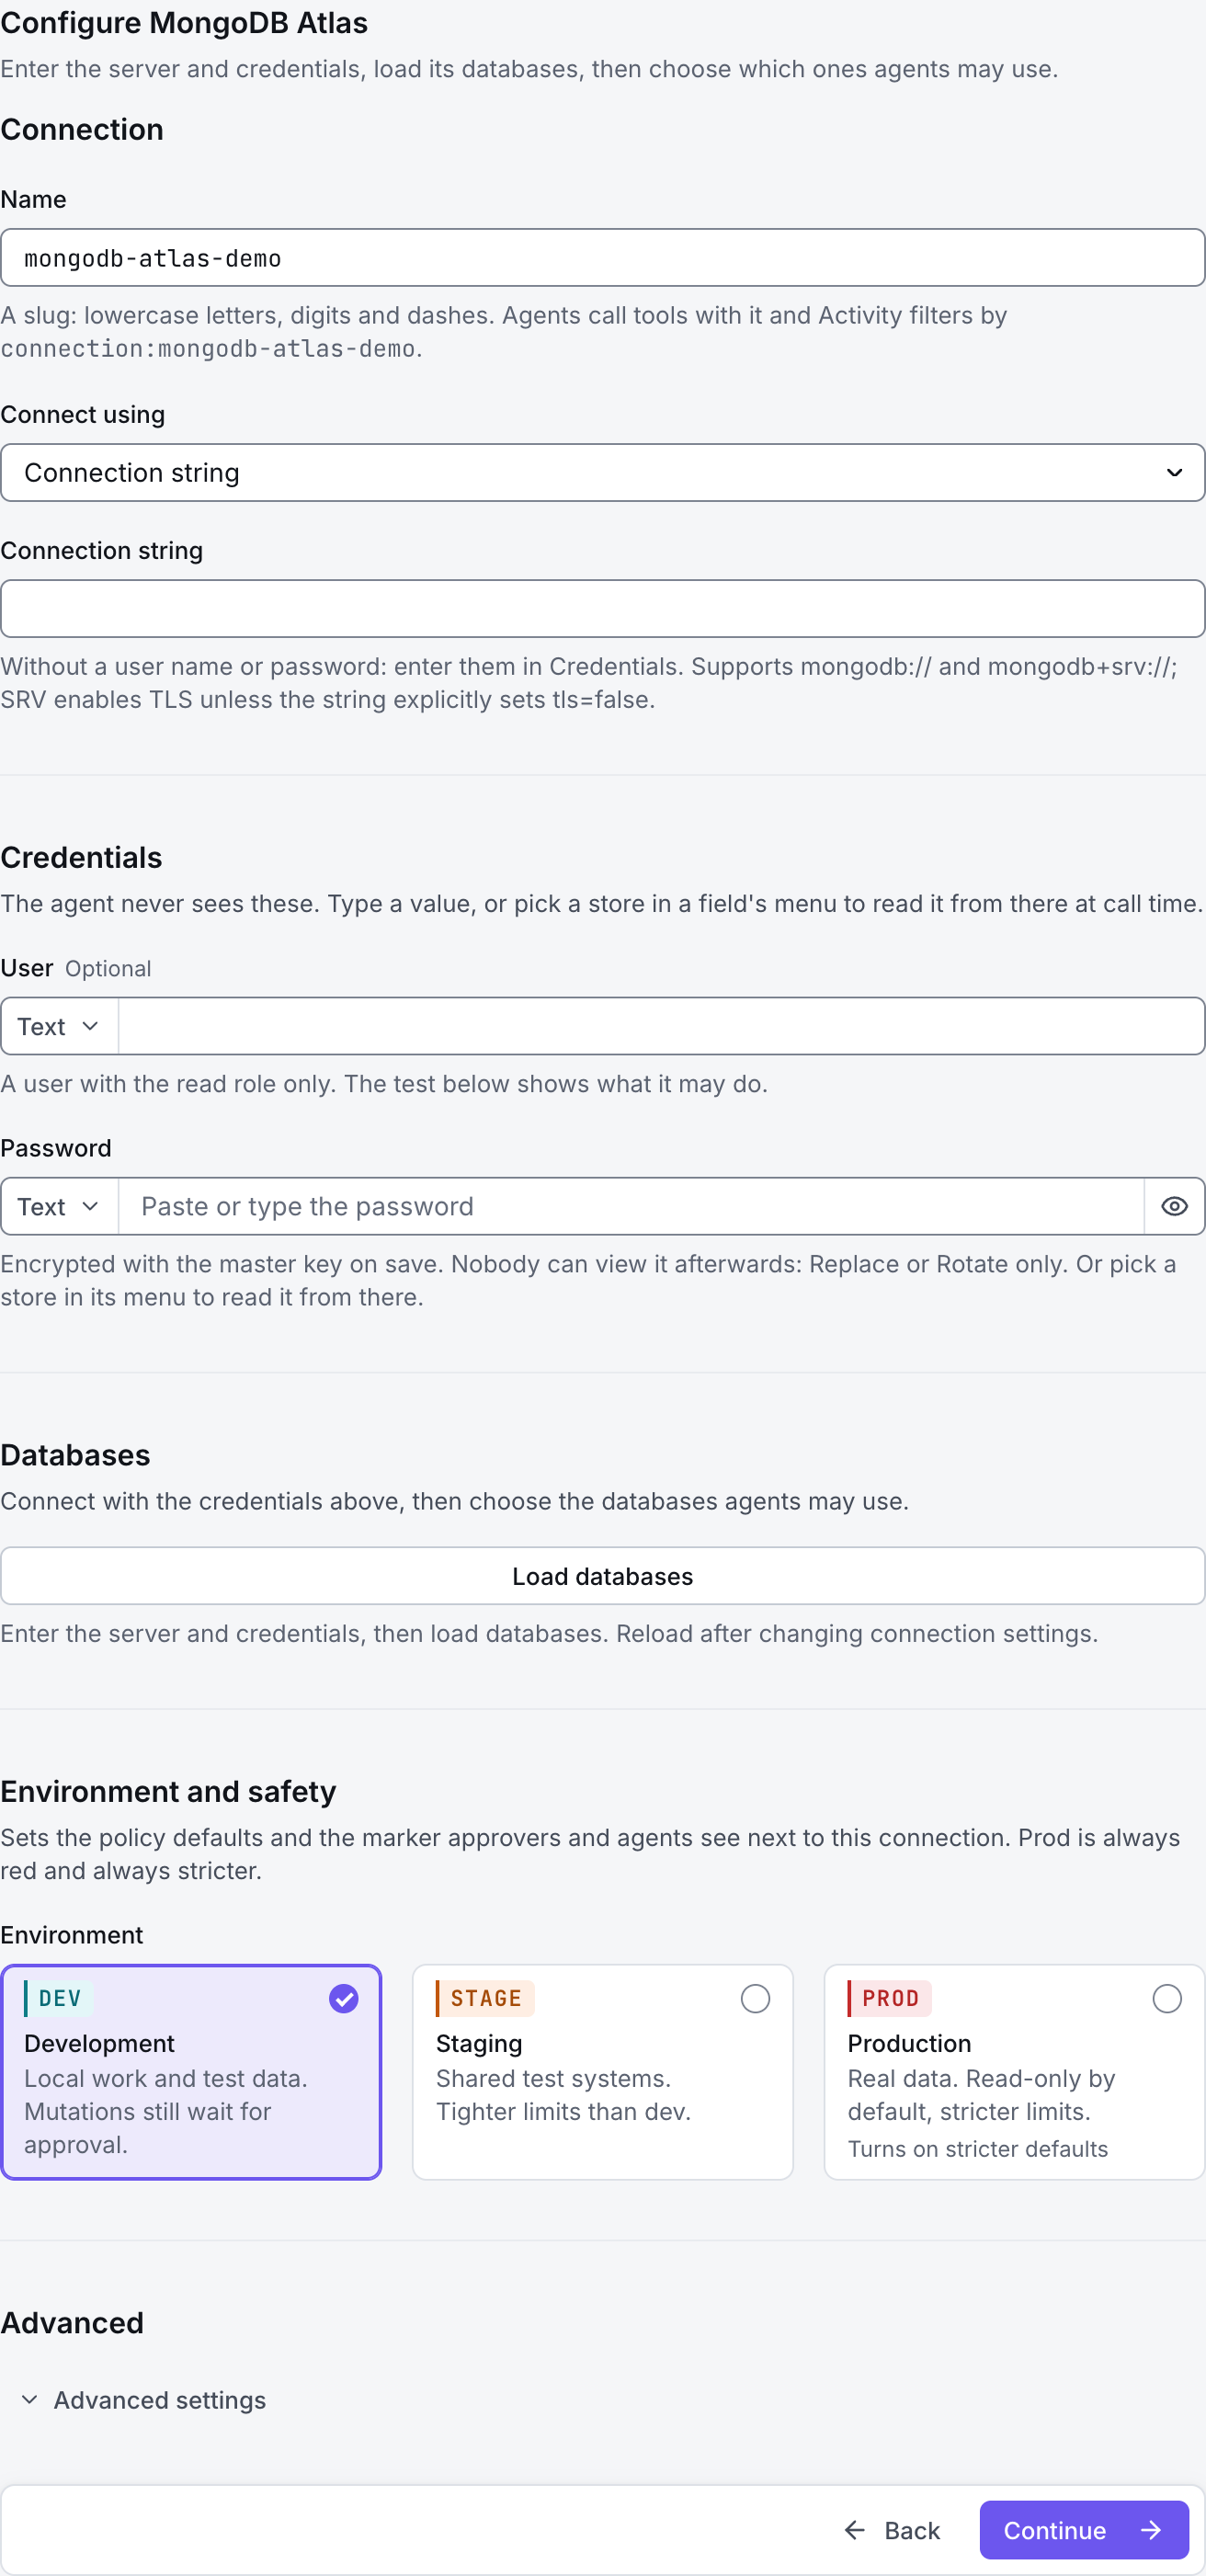
The screenshots show GateRook 2.0.0: the MongoDB Atlas form, the endpoint selector, and this connector’s actual tool preview. The form and preview have not been saved. Select a screenshot to open it at full size.
1. Create a connection and enter the settings
In GateRook, open Connections, select Add connection, search for MongoDB Atlas, choose its card and select Continue to configure.
Create a database user for the Atlas deployment and grant read access to the databases you need. An Atlas account used to sign into the console is separate from a database user.
Allow the GateRook computer through the project IP access list, or use the configured private network. Copy the deployment connection string from Atlas Connect.
Enter a Name, for example mongodb-atlas-demo. Your AI app uses this name to choose the connection.
Set Connect using to Connection string. Paste the Atlas mongodb+srv:// address into Connection string, removing the username and password from the URI. Keep Connection type at TLS.
Enter the database login in User and Password. In Advanced, use the database user's Auth database, normally admin. If the URI includes authSource or readPreference, match the corresponding form fields.
Use Load databases and select only the required Databases. In Advanced, narrow Collections the agent may read with entries such as shop.orders; replace these examples with your own database and collection names.
Choose Development, Staging or Production to match the service. Review the connector’s limit and access settings before continuing.
2. Test the connection and add it to an endpoint
Select Continue to test. GateRook checks the settings from your computer. Review the result and resolve any connection, certificate or permission error before continuing.
A timeout usually calls for checking the Atlas IP access list, private DNS or VPN; an authentication error calls for checking the database user and Auth database. A successful network connection does not grant access to unselected databases.
After the test passes, select Continue to add to an endpoint. Choose the endpoint your AI app uses, review its tool modes, then select Save connection. GateRook offers default as the starter endpoint.

3. Use the connection from your AI IDE
After saving MongoDB Atlas on the endpoint and passing its connection test, ask your AI app to use mongodb-atlas-demo, or the name you chose. If its tools are missing, confirm the endpoint assignment and refresh the MCP connection or start a new chat.
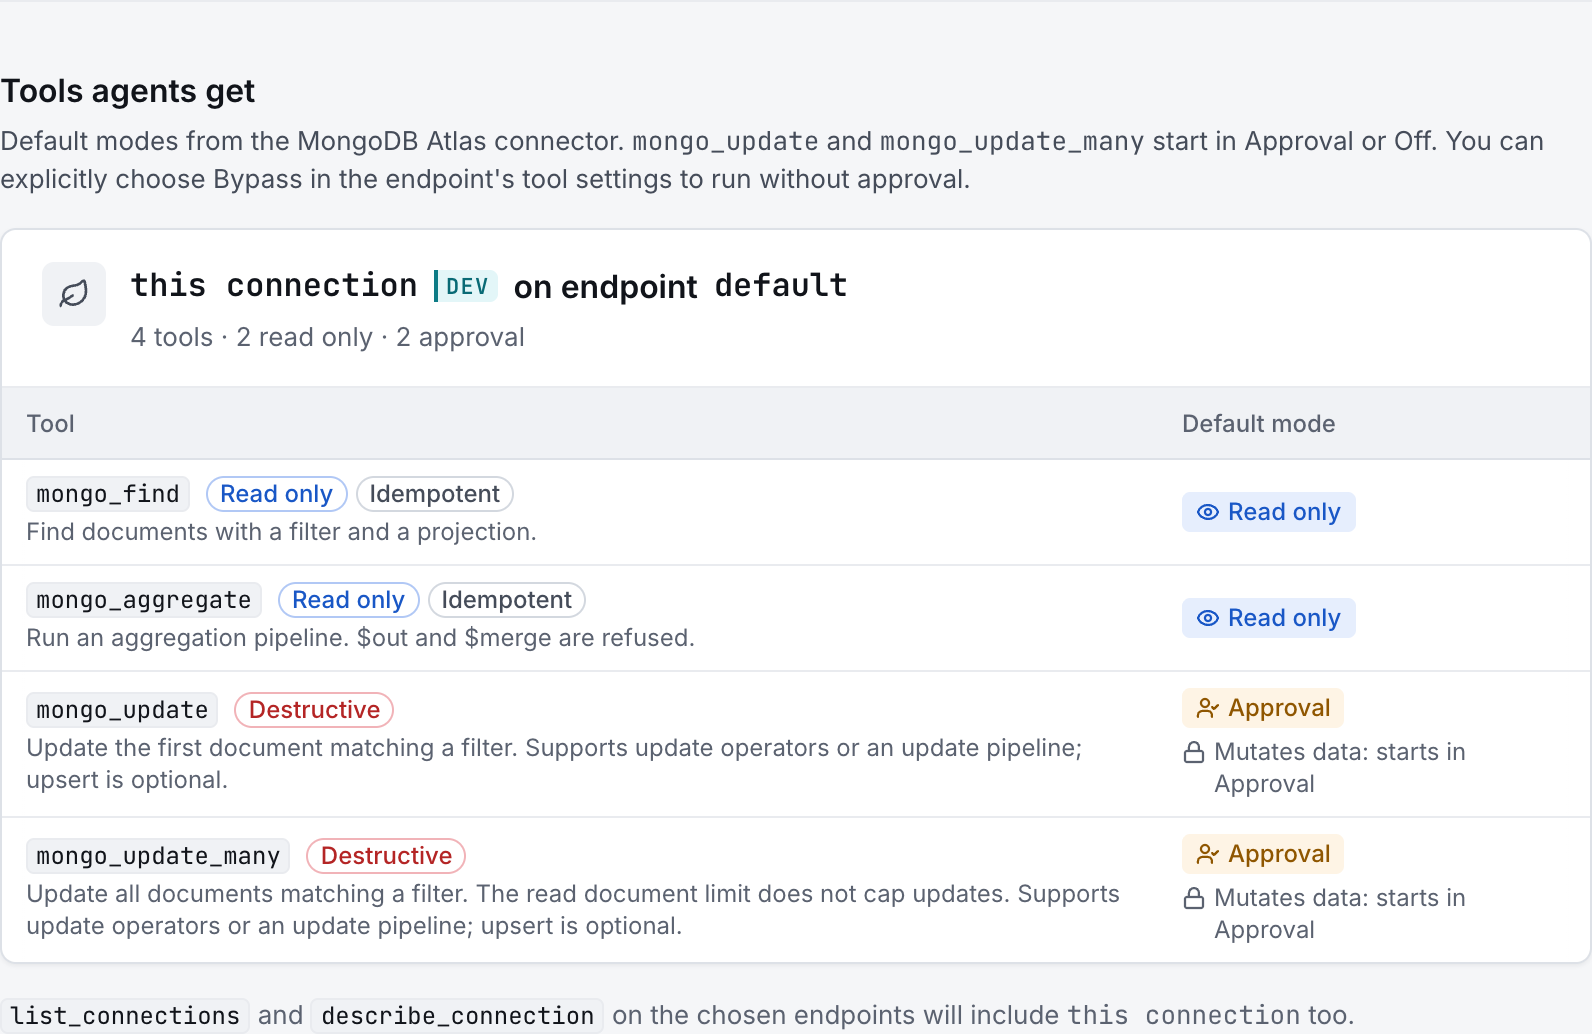
The preview below shows this connector’s default tools before saving. The table explains what each tool can do; connection settings, credentials and endpoint policies can restrict access further.
Start with a small read request. Replace example resource names with existing resources your connection may access. Open Activity after the call to inspect its connection, tool, arguments, policy decision and result metadata.
Ask your AI, for example
- “List the permitted databases and collections without changing anything.”
- “Inspect the fields and indexes of the orders collection, if it exists.”
- “Show at most 10 recent order documents, returning only status and creation time.”
| Tool | What it does | Starts as |
|---|---|---|
mongo_find | Find documents with a filter and a projection. | Read only |
mongo_aggregate | Run an aggregation pipeline. $out and $merge are refused. | Read only |
mongo_update | Update the first document matching a filter. Supports update operators or an update pipeline; upsert is optional. | Approval |
mongo_update_many | Update all documents matching a filter. The read document limit does not cap updates. Supports update operators or an update pipeline; upsert is optional. | Approval |
You can change each tool’s mode on the endpoint. Every call your AI makes appears in Activity.