
Cypher reads in read-only transactions, the graph's schema and its nodes and paths. Writes wait for approval.
The screenshots show GateRook 2.0.0: the Neo4j form, the endpoint selector, and this connector’s actual tool preview. The form and preview have not been saved. Select a screenshot to open it at full size.
1. Create a connection and enter the settings
In GateRook, open Connections, select Add connection, search for Neo4j, choose its card and select Continue to configure. GateRook downloads the official Neo4j connector module when you choose it. Wait for the download and verification to finish before configuring the connection.
Find the Neo4j connection URI and the application database name. Use an identity with the reader role or equivalent access to the graph you intend to expose.
Prepare a username and password, or a bearer token from the identity provider your Neo4j deployment trusts. Remote connections use verified TLS.
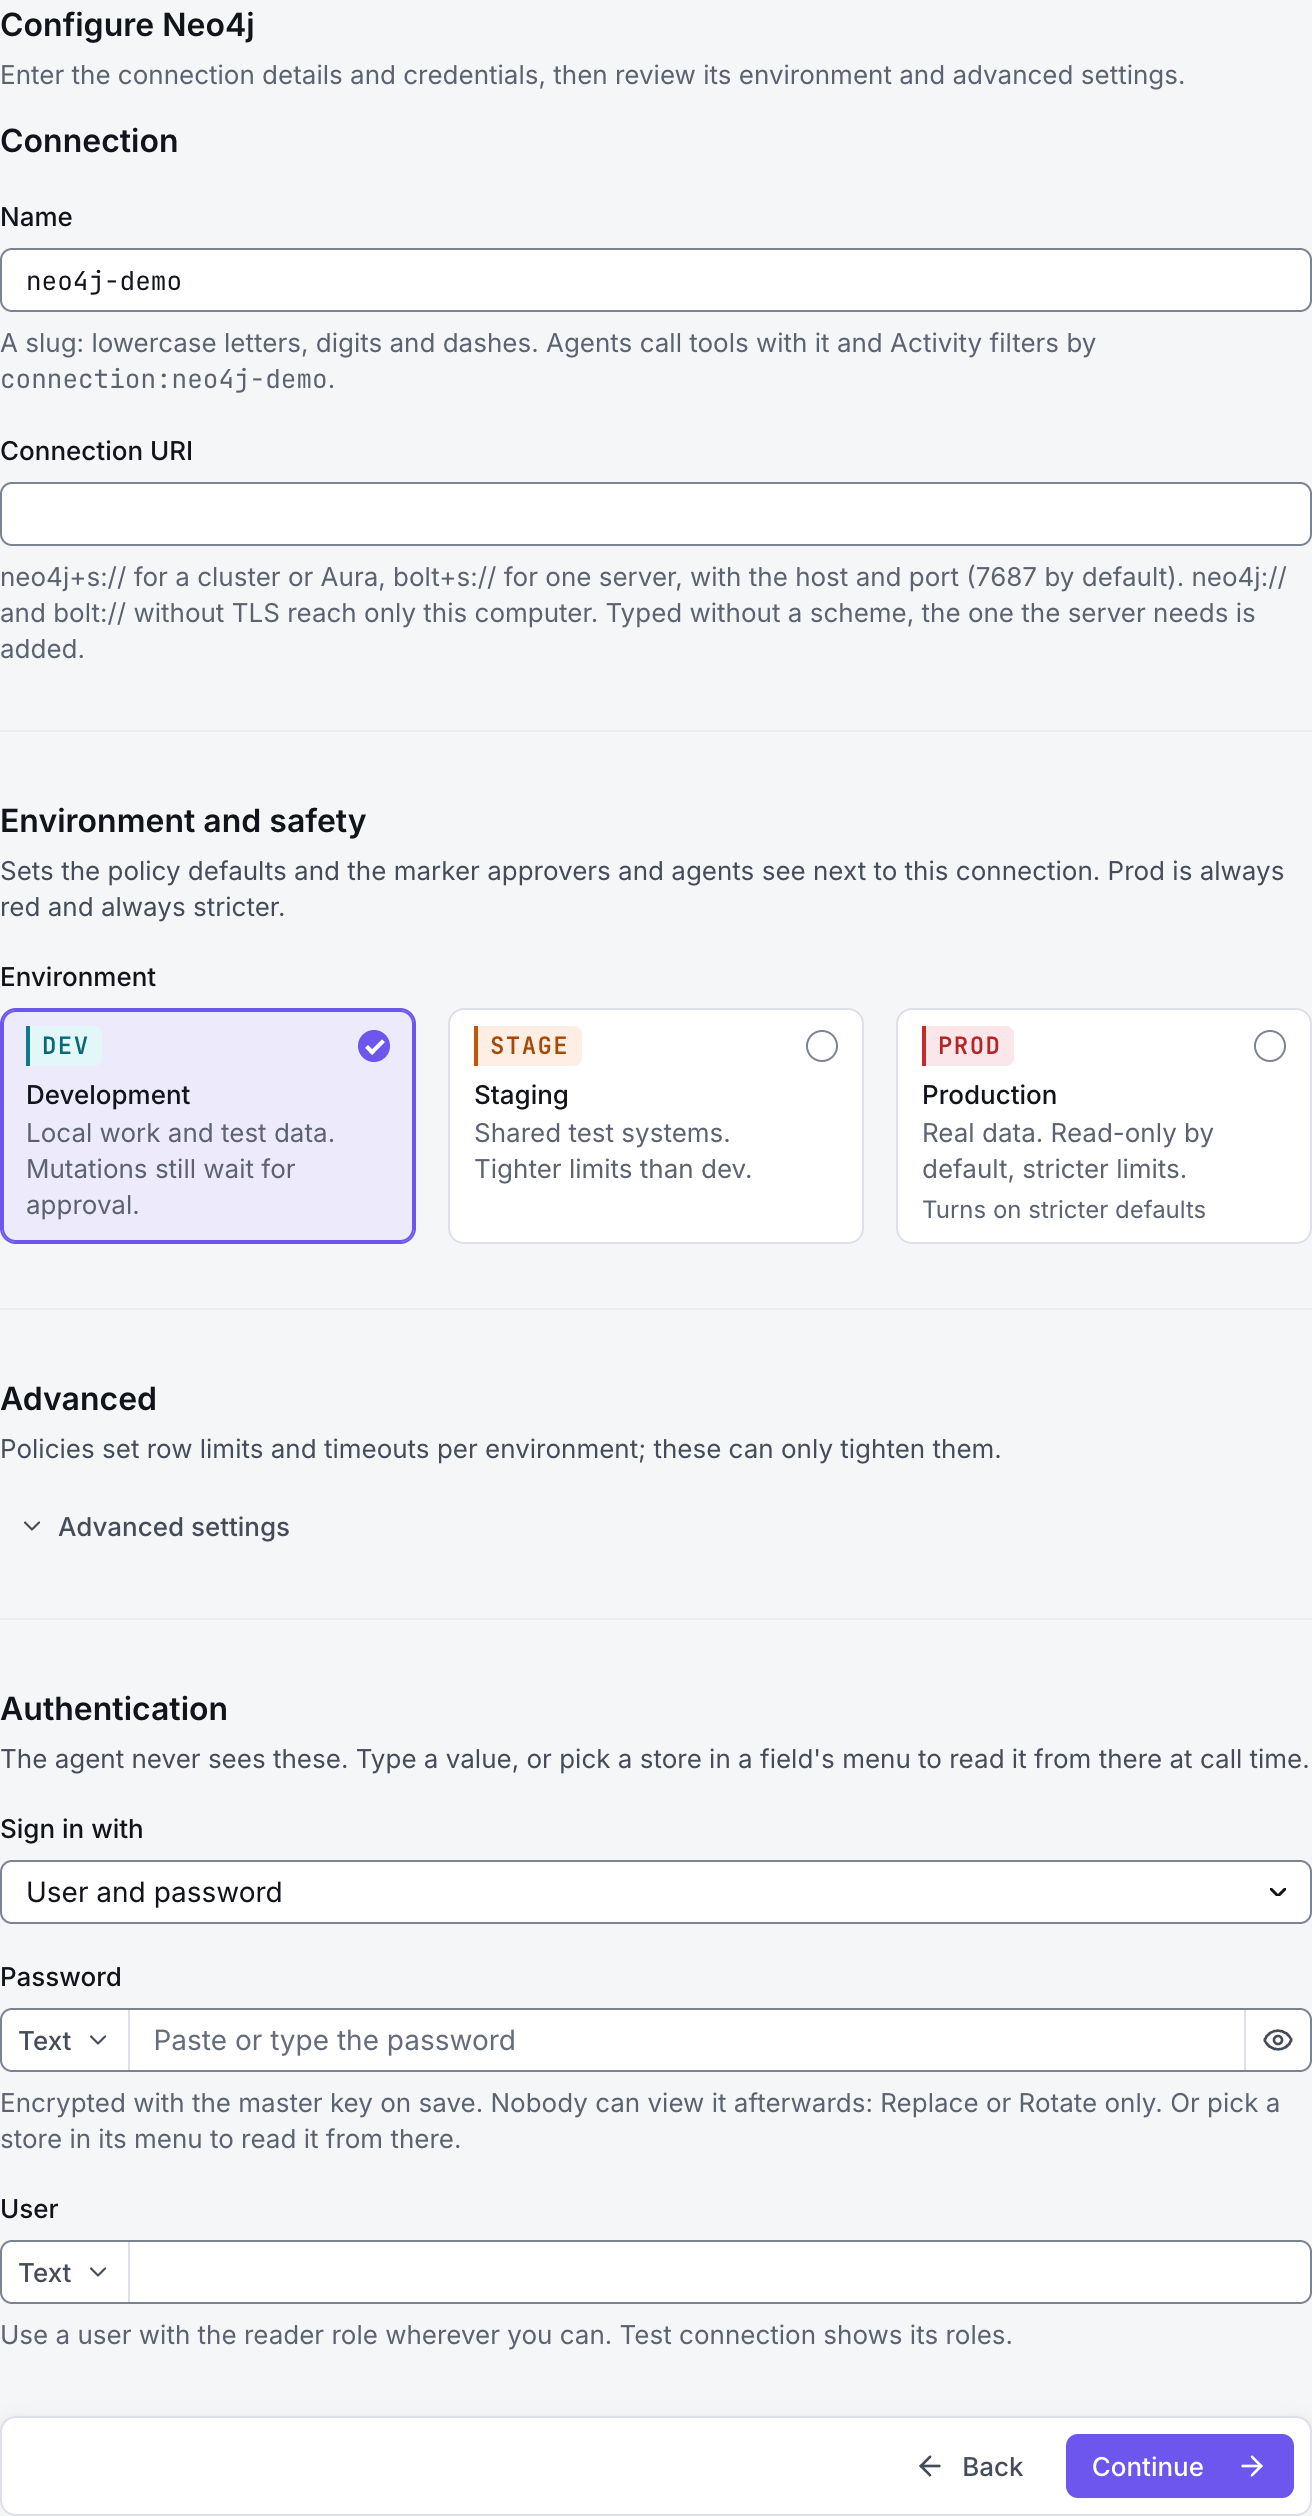
Enter a Name, for example neo4j-demo. Your AI app uses this name to choose the connection.
Enter Connection URI using neo4j+s:// for routing to a cluster or bolt+s:// for one server, commonly on port 7687. Enter the application Database, not system.
Choose User and password or Bearer token (single sign-on) under Sign in with and supply the displayed credentials.
For a private CA, enter CA certificate (PEM). Review Rows per query and Transaction timeout under Advanced if you need tighter limits.
Choose Development, Staging or Production to match the service. Review the connector’s limit and access settings before continuing.
2. Test the connection and add it to an endpoint
Select Continue to test. GateRook checks the settings from your computer. Review the result and resolve any connection, certificate or permission error before continuing.
Check the URI scheme, reachable routing addresses and TLS host name if the connection fails. For an expired bearer token, obtain a new one from the configured identity provider. The selected database and user roles must allow the requested reads.
After the test passes, select Continue to add to an endpoint. Choose the endpoint your AI app uses, review its tool modes, then select Save connection. GateRook offers default as the starter endpoint.

3. Use the connection from your AI IDE
After saving Neo4j on the endpoint and passing its connection test, ask your AI app to use neo4j-demo, or the name you chose. If its tools are missing, confirm the endpoint assignment and refresh the MCP connection or start a new chat.
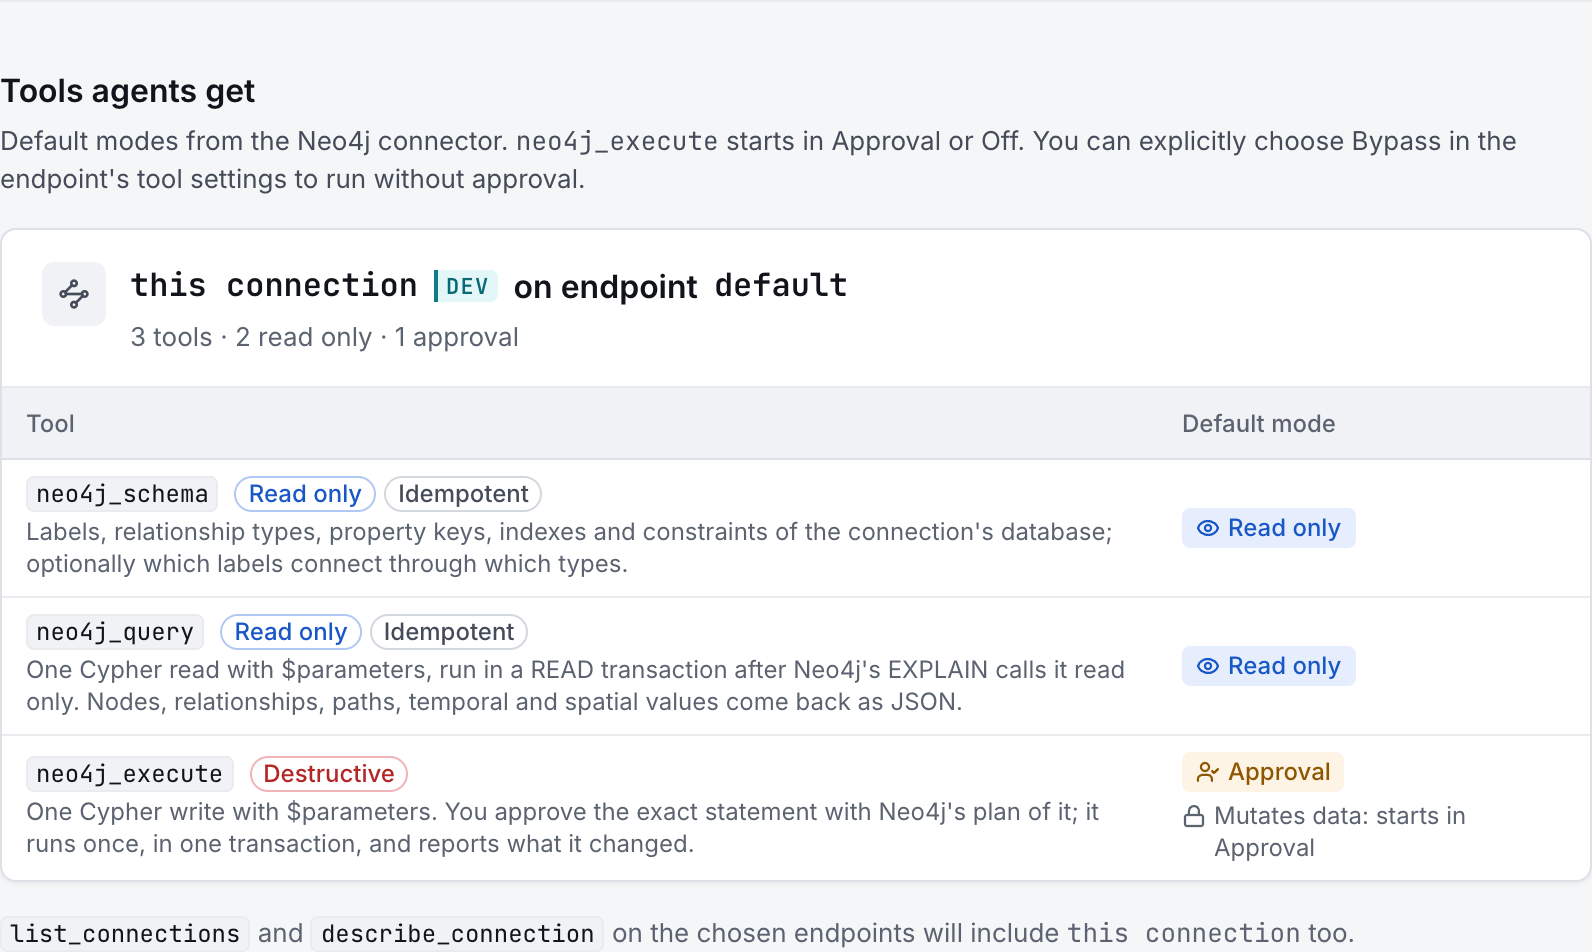
The preview below shows this connector’s default tools before saving. The table explains what each tool can do; connection settings, credentials and endpoint policies can restrict access further.
Start with a small read request. Replace example resource names with existing resources your connection may access. Open Activity after the call to inspect its connection, tool, arguments, policy decision and result metadata.
Ask your AI, for example
- “Describe the node labels and relationship types available through neo4j-demo.”
- “Using neo4j-demo, count nodes by label with a read-only Cypher query.”
- “Show up to five products linked to customer customer-123 on neo4j-demo without changing the graph.”
| Tool | What it does | Starts as |
|---|---|---|
neo4j_schema | Labels, relationship types, property keys, indexes and constraints of the connection's database; optionally which labels connect through which types. | Read only |
neo4j_query | One Cypher read with $parameters, run in a READ transaction after Neo4j's EXPLAIN calls it read only. Nodes, relationships, paths, temporal and spatial values come back as JSON. | Read only |
neo4j_execute | One Cypher write with $parameters. You approve the exact statement with Neo4j's plan of it; it runs once, in one transaction, and reports what it changed. | Approval |
You can change each tool’s mode on the endpoint. Every call your AI makes appears in Activity.